 v1.0.4New Mutation Calculators, Fishing, Bosses, Team Builder! | PingPlayers Dedicated Servers-30%x
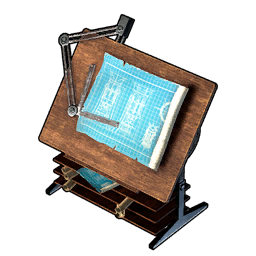
Drafting Table
Product > Craft
General
| Hp | 1000 |
| Defense | 2 |
| Required build work amount | 20000 |
Crafting
| Target rank max | 1 |
Recipe
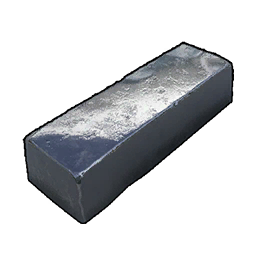 Refined Ingot Refined Ingot | Qt. 20 |
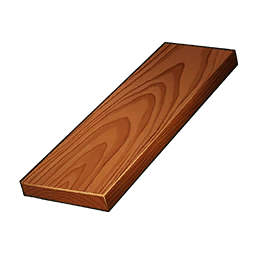 High Quality Wooden Board High Quality Wooden Board | Qt. 10 |
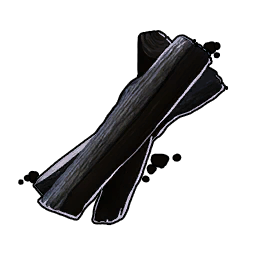 Charcoal Charcoal | Qt. 30 |
Description
A facility that lets you combine multiple schematics to create more advanced ones.Craftable items
275 items
 Old Bow Schematic 2Old Bow Schematic 3Old Bow Schematic 4Crossbow Schematic 2Crossbow Schematic 3Crossbow Schematic 4Assault Rifle Schematic 2Assault Rifle Schematic 3Assault Rifle Schematic 4Pump-Action Shotgun Schematic 2Pump-Action Shotgun Schematic 3Pump-Action Shotgun Schematic 4Handgun Schematic 2Handgun Schematic 3Handgun Schematic 4Rocket Launcher Schematic 2Rocket Launcher Schematic 3Rocket Launcher Schematic 4Musket Schematic 2Musket Schematic 3Musket Schematic 4Double-Barreled Shotgun Schematic 2Double-Barreled Shotgun Schematic 3Double-Barreled Shotgun Schematic 4Single-Shot Rifle Schematic 2Single-Shot Rifle Schematic 3Single-Shot Rifle Schematic 4Feathered Hair Band Schematic 2Feathered Hair Band Schematic 3Feathered Hair Band Schematic 4Metal Helm Schematic 2Metal Helm Schematic 3Metal Helm Schematic 4Refined Metal Helm Schematic 2Refined Metal Helm Schematic 3Refined Metal Helm Schematic 4Pal Metal Helm Schematic 2Pal Metal Helm Schematic 3Pal Metal Helm Schematic 4Cloth Outfit Schematic 2Cloth Outfit Schematic 3Cloth Outfit Schematic 4Pelt Armor Schematic 2Pelt Armor Schematic 3Pelt Armor Schematic 4Metal Armor Schematic 2Metal Armor Schematic 3Metal Armor Schematic 4Refined Metal Armor Schematic 2Refined Metal Armor Schematic 3Refined Metal Armor Schematic 4Pal Metal Armor Schematic 2Pal Metal Armor Schematic 3Pal Metal Armor Schematic 4Tropical Outfit Schematic 2Tropical Outfit Schematic 3Tropical Outfit Schematic 4Tundra Outfit Schematic 2Tundra Outfit Schematic 3Tundra Outfit Schematic 4Heat Resistant Pelt Armor Schematic 2Heat Resistant Pelt Armor Schematic 3Heat Resistant Pelt Armor Schematic 4Cold Resistant Pelt Armor Schematic 2Cold Resistant Pelt Armor Schematic 3Cold Resistant Pelt Armor Schematic 4Heat Resistant Metal Armor Schematic 2Heat Resistant Metal Armor Schematic 3Heat Resistant Metal Armor Schematic 4Cold Resistant Metal Armor Schematic 2Cold Resistant Metal Armor Schematic 3Cold Resistant Metal Armor Schematic 4Heat Resistant Refined Metal Armor Schematic 2Heat Resistant Refined Metal Armor Schematic 3Heat Resistant Refined Metal Armor Schematic 4Cold Resistant Refined Metal Armor Schematic 2Cold Resistant Refined Metal Armor Schematic 3Cold Resistant Refined Metal Armor Schematic 4Heat Resistant Pal Metal Armor Schematic 2Heat Resistant Pal Metal Armor Schematic 3Heat Resistant Pal Metal Armor Schematic 4Cold Resistant Pal Metal Armor Schematic 2Cold Resistant Pal Metal Armor Schematic 3Cold Resistant Pal Metal Armor Schematic 4Makeshift Handgun Schematic 2Makeshift Handgun Schematic 3Makeshift Handgun Schematic 4Laser Rifle Schematic 2Laser Rifle Schematic 3Laser Rifle Schematic 4Flamethrower Schematic 2Flamethrower Schematic 3Flamethrower Schematic 4Grenade Launcher Schematic 2Grenade Launcher Schematic 3Grenade Launcher Schematic 4Guided Missile Launcher Schematic 2Guided Missile Launcher Schematic 3Guided Missile Launcher Schematic 4Multi Guided Missile Launcher Schematic 1Multi Guided Missile Launcher Schematic 2Multi Guided Missile Launcher Schematic 3Multi Guided Missile Launcher Schematic 4Gatling Gun Schematic 2Gatling Gun Schematic 3Gatling Gun Schematic 4Plasteel Armor Schematic 2Plasteel Armor Schematic 3Plasteel Armor Schematic 4Heat Resistant Plasteel Armor Schematic 2Heat Resistant Plasteel Armor Schematic 3Heat Resistant Plasteel Armor Schematic 4Cold Resistant Plasteel Armor Schematic 2Cold Resistant Plasteel Armor Schematic 3Cold Resistant Plasteel Armor Schematic 4Lightweight Plasteel Armor Schematic 2Lightweight Plasteel Armor Schematic 3Lightweight Plasteel Armor Schematic 4Plasteel Helmet Schematic 2Plasteel Helmet Schematic 3Plasteel Helmet Schematic 4Hexolite Helmet Schematic 2Hexolite Helmet Schematic 3Hexolite Helmet Schematic 4Hexolite Armor Schematic 2Hexolite Armor Schematic 3Hexolite Armor Schematic 4Heat Resistant Hexolite Armor Schematic 2Heat Resistant Hexolite Armor Schematic 3Heat Resistant Hexolite Armor Schematic 4Cold Resistant Hexolite Armor Schematic 2Cold Resistant Hexolite Armor Schematic 3Cold Resistant Hexolite Armor Schematic 4Lightweight Hexolite Armor Schematic 2Lightweight Hexolite Armor Schematic 3Lightweight Hexolite Armor Schematic 4Laser Gatling Gun Schematic 2Laser Gatling Gun Schematic 3Laser Gatling Gun Schematic 4Plasma Cannon Schematic 2Plasma Cannon Schematic 3Plasma Cannon Schematic 4Semi-Auto Shotgun Schematic 2Semi-Auto Shotgun Schematic 3Semi-Auto Shotgun Schematic 4Old Revolver Schematic 2Old Revolver Schematic 3Old Revolver Schematic 4Makeshift Assault Rifle Schematic 2Makeshift Assault Rifle Schematic 3Makeshift Assault Rifle Schematic 4Semi-Auto Rifle Schematic 2Semi-Auto Rifle Schematic 3Semi-Auto Rifle Schematic 4Makeshift SMG Schematic 2Makeshift SMG Schematic 3Makeshift SMG Schematic 4SMG Schematic 2SMG Schematic 3SMG Schematic 4Makeshift Shotgun Schematic 2Makeshift Shotgun Schematic 3Makeshift Shotgun Schematic 4Advanced Bow Schematic 2Advanced Bow Schematic 3Advanced Bow Schematic 4Compound Bow Schematic 2Compound Bow Schematic 3Compound Bow Schematic 4Overheat Rifle Schematic 2Overheat Rifle Schematic 3Overheat Rifle Schematic 4Charge Rifle Schematic 2Charge Rifle Schematic 3Charge Rifle Schematic 4Energy Shotgun Schematic 2Energy Shotgun Schematic 3Energy Shotgun Schematic 4Excalibur Schematic 1Excalibur Schematic 2Excalibur Schematic 3Excalibur Schematic 4Terraprisma Schematic 1Terraprisma Schematic 2Terraprisma Schematic 3Terraprisma Schematic 4Vortex Beater Schematic 1Vortex Beater Schematic 2Vortex Beater Schematic 3Vortex Beater Schematic 4Nightglow Schematic 1Nightglow Schematic 2Nightglow Schematic 3Nightglow Schematic 4Terra Blade Schematic 1Terra Blade Schematic 2Terra Blade Schematic 3Terra Blade Schematic 4Hallowed Mask Schematic 1Hallowed Mask Schematic 2Hallowed Mask Schematic 3Hallowed Mask Schematic 4Hallowed Headgear Schematic 1Hallowed Headgear Schematic 2Hallowed Headgear Schematic 3Hallowed Headgear Schematic 4Hallowed Plate Mail Schematic 1Hallowed Plate Mail Schematic 2Hallowed Plate Mail Schematic 3Hallowed Plate Mail Schematic 4Hallowed Helmet Schematic 1Hallowed Helmet Schematic 2Hallowed Helmet Schematic 3Hallowed Helmet Schematic 4Hallowed Hood Schematic 1Hallowed Hood Schematic 2Hallowed Hood Schematic 3Hallowed Hood Schematic 4Mechanical Bow Schematic 2Mechanical Bow Schematic 3Mechanical Bow Schematic 4Combat SMG Schematic 2Combat SMG Schematic 3Combat SMG Schematic 4Prototype Shotgun Schematic 2Prototype Shotgun Schematic 3Prototype Shotgun Schematic 4Heavy Assault Rifle Schematic 2Heavy Assault Rifle Schematic 3Heavy Assault Rifle Schematic 4Tactical Grenade Launcher Schematic 2Tactical Grenade Launcher Schematic 3Tactical Grenade Launcher Schematic 4Laser Sword Schematic 2Laser Sword Schematic 3Laser Sword Schematic 4Beam Scatter Schematic 2Beam Scatter Schematic 3Beam Scatter Schematic 4Drone Launcher Schematic 2Drone Launcher Schematic 3Drone Launcher Schematic 4Plasma Rifle Schematic 2Plasma Rifle Schematic 3Plasma Rifle Schematic 4Beam Launcher Schematic 2Beam Launcher Schematic 3Beam Launcher Schematic 4Sword Schematic 2Sword Schematic 3Sword Schematic 4Katana Schematic 2Katana Schematic 3Katana Schematic 4Beam Sword Schematic 2Beam Sword Schematic 3Beam Sword Schematic 4Ancient Helm Schematic 2Ancient Helm Schematic 3Ancient Helm Schematic 4Ancient Armor Schematic 2Ancient Armor Schematic 3Ancient Armor Schematic 4Heat-Resistant Ancient Armor Schematic 2Heat-Resistant Ancient Armor Schematic 3Heat-Resistant Ancient Armor Schematic 4Cold-Resistant Ancient Armor Schematic 2Cold-Resistant Ancient Armor Schematic 3Cold-Resistant Ancient Armor Schematic 4Lightweight Ancient Armor Schematic 2Lightweight Ancient Armor Schematic 3Lightweight Ancient Armor Schematic 4Metal Bat Schematic 2Metal Bat Schematic 3Metal Bat Schematic 4